A huge portion of the challenge in building a self-driving car is environment perception. Autonomous vehicles may use many different types of inputs to help them perceive their environment and make decisions about how to navigate. The field of computer vision includes techniques to allow a self-driving car to perceive its environment simply by looking at inputs from cameras. Cameras have a much higher spatial resolution than radar and lidar, and while raw camera images themselves are two-dimensional, their higher resolution often allows for inference of the depth of objects in a scene. Plus, cameras are much less expensive than radar and lidar sensors, giving them a huge advantage in current self-driving car perception systems. In the future, it is even possible that self-driving cars will be outfitted simply with a suite of cameras and intelligent software to interpret the images, much like a human does with its two eyes and a brain.
When operating on roadways, correctly identifying lane lines is critical for safe vehicle operation to prevent collisions with other vehicles, road boundaries, or other objects. While GPS measurements and other object detection inputs can help to localize a vehicle with high precision according to a predefined map, following lane lines painted on the road surface is still important; real lane boundaries will always take precedence over static map boundaries.
While the previous lane line finding project allowed for identification of lane lines under ideal conditions, this lane line detection pipeline can detect lane lines the face of challenges such as curving lanes, shadows, and pavement color changes. This pipeline also computes lane curvature and the location of the vehicle relative to the center of the lane, which informs path planning and eventually control systems (steering, throttle, brake, etc).
I created a software pipeline which identifies lane boundaries in a video from a front-facing vehicle camera. The following techniques are used:
- Compute the camera calibration matrix and distortion coefficients given a set of chessboard images.
- Apply a distortion correction to raw images.
- Use color transforms, gradients, etc., to create a thresholded binary image.
- Apply a perspective transform to rectify binary image (“bird’s-eye view”)
- Detect lane pixels and fit to find the lane boundary.
- Determine the curvature of the lane and vehicle position with respect to center.
- Warp the detected lane boundaries back onto the original image.
- Output visual display of the lane boundaries and numerical estimation of lane curvature and vehicle position.
Exploring my implementation
All of the code and resources used in this project are available in my Github repository. Enjoy!
Technologies Used
- Python
- NumPy
- OpenCV
Camera Calibration
Cameras do not create perfect image representations of real life. Images are often distorted, especially around the edges; edges can often get stretched or skewed. This is problematic for lane line finding as the curvature of a lane could easily be miscomputed simply due to distortion.
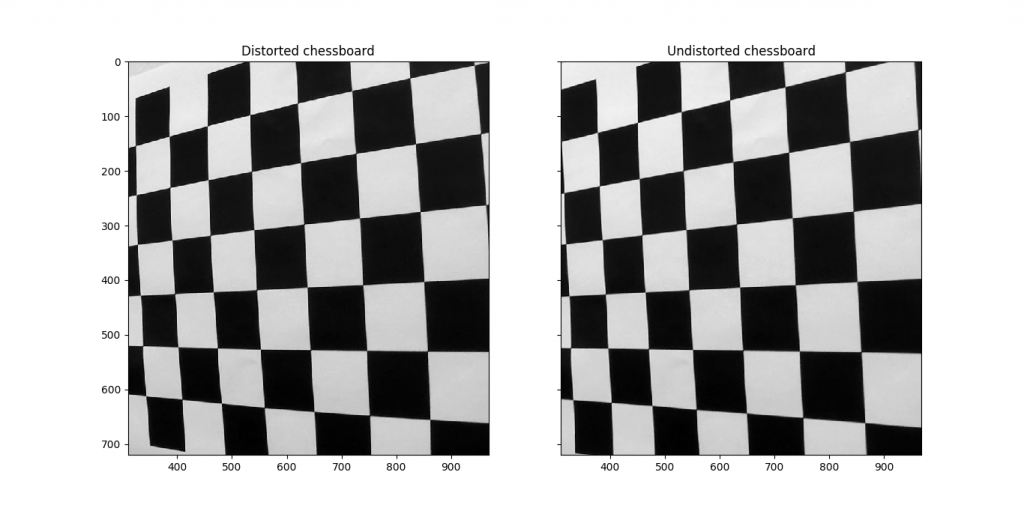
The qualities of the distortion for a given camera can generally be represented as five constants, collectively called the “distortion coefficients”. Once the coefficients of a given camera are computed, distortion in images produced can be reversed. To compute the distortion coefficients of a given camera, images of chessboard calibration patterns can be used. The OpenCV library has built-in methods to achieve this.
Computing the camera matrix and distortion coefficients
This method starts by preparing “object points”, which will be the (x, y, z) coordinates of the chessboard corners in the world. Here I am assuming the chessboard is fixed on the (x, y) plane at z=0, such that the object points are the same for each calibration image. Thus, objp is just a replicated array of coordinates, and objpoints will be appended with a copy of it every time I successfully detect all chessboard corners in a test image. img_points will be appended with the (x, y) pixel position of each of the corners in the image plane with each successful chessboard detection.
Next, each chessboard calibration image is processed individually. Each image is converted to grayscale, then cv2.findChessboardCorners is used to detect the corners. Corners detected are made more accurate by using cv2.cornerSubPix with a suitable search termination criteria, then the object points and image points are added for later calibration.
Finally, the image points and object points are used to compute the camera calibration and distortion coefficients using the cv2.calibrateCamera() method.
I applied this distortion correction to the test image using cv2.undistort() and obtained this result:
Pipeline functions
Distortion correction
The distortion correction method correct_distortion() is used on a road image, as can be seen in this before and after image:

Binary image thresholding
Using the Sobel operator, a camera image can be transformed to reveal only strong lines that are likely to be lane lines. This has an advantage over Canny edge detection in that it ignores much of the gradient noise in an image which is not likely to be part of a lane line. Detected gradients can be filtered in both the horizontal and vertical directions using thresholds with different magnitudes to allow for much more precise detection of lane lines. Similarly, using different color channels in the gradient detection can help to increase the accuracy of lines selected.
To create a thresholded binary image, I detect horizontal line segments through a Sobel x gradient computation, white lines through a identifying high signal in the L channel of the LUV color space, and yellow lines through identifying low (yellow) signal in the B channel of the LAB color space. Any pixel identified by any of the three filters contributes to the binary image.
Here is an example of an original image and a thresholded binary created from it:
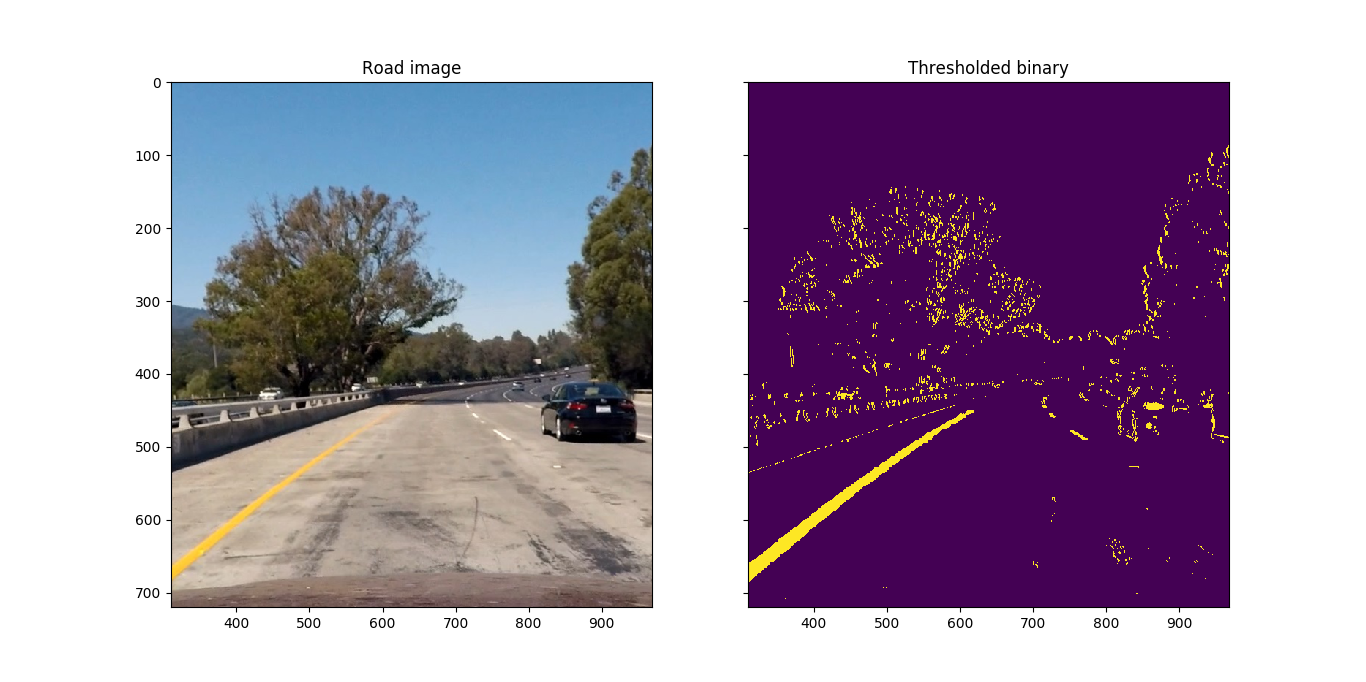
Note that the thresholding detection picks up many other pixels that are not part of the yellow or white lane lines, though the selected pixel density in the lanes are significantly greater than the overall noise in the thresholded binary image so as to not confuse the lane line detection in a future step.
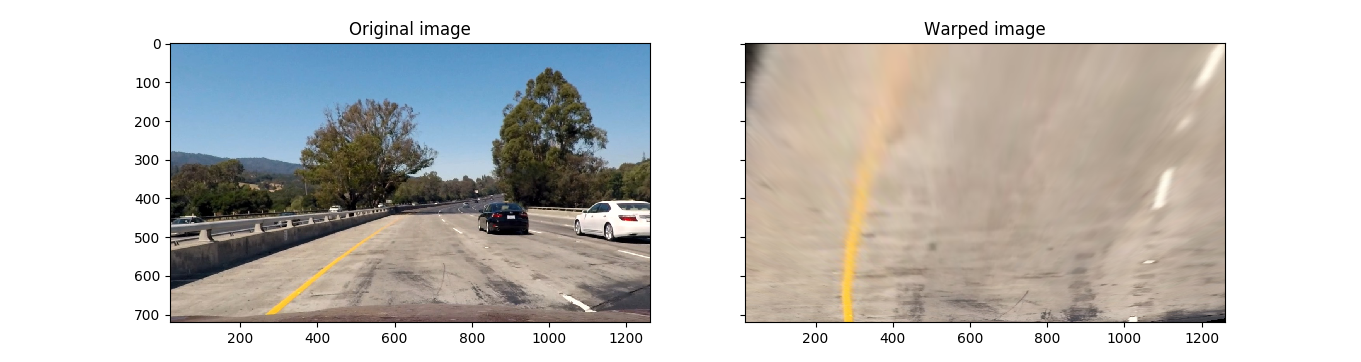
Perspective transformation
In order to determine the curvature of lane lines in an image, the lane lines need to be visualized from the top, as if from a bird’s-eye view. To do this, a perspective transform can be used to map from the front-of-vehicle view to an imaginary bird’s-eye view.
I compute a perspective transform using a hardcoded trapezoid and rectangle determined by visual inspection in the original unwarped image.
This results in the following source and destination points:
| Source | Destination |
|---|---|
| 589, 455 | 300, 0 |
| 692, 455 | 1030, 0 |
| 1039, 676 | 980, 719 |
| 268, 676 | 250, 719 |
The effect of the perspective transform can be seen by viewing the pre and post-transformed images:
Identifying lane line pixels and lane curve extrapolation
Once raw camera images have been distortion-corrected, gradient-thresholded, and perspective-transformed, the result is ready to have lane lines identified.
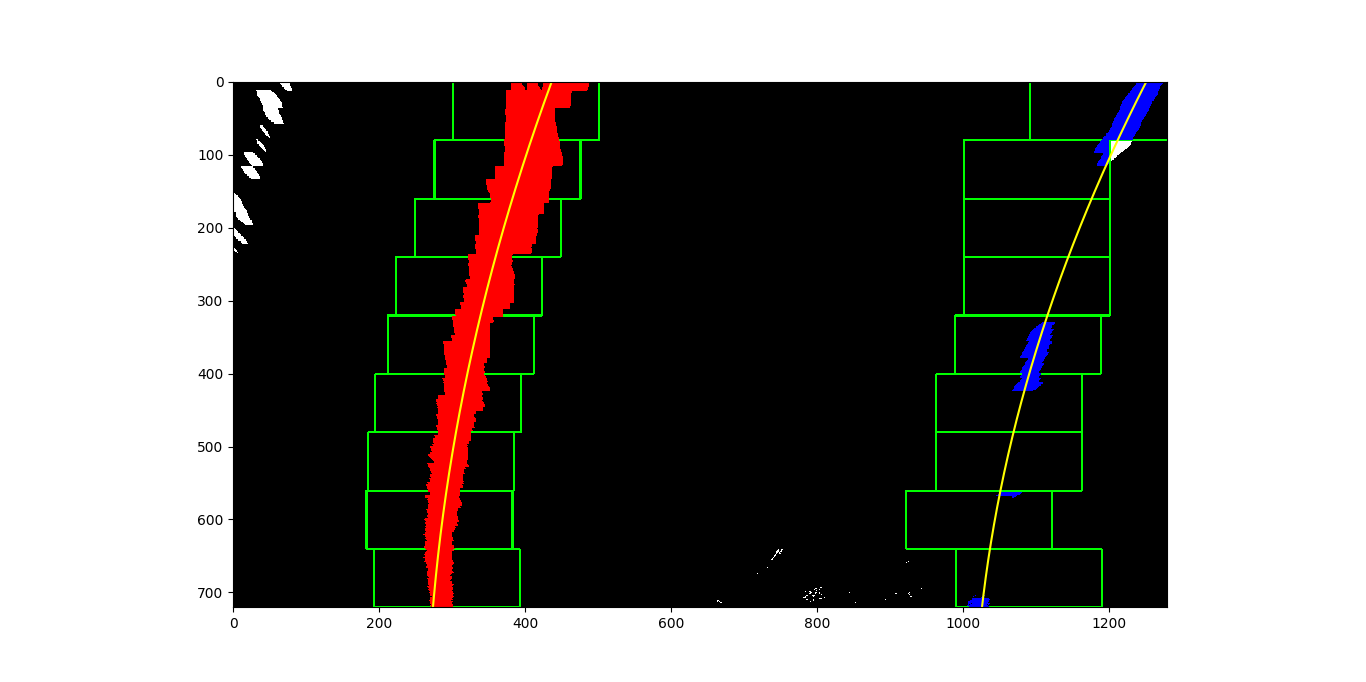
I used two methods of identifying lane lines in a thresholded binary image and fitting with a polynomial. The first method identifies pixels by a naive sliding window detection algorithm; the second method identifies pixels by starting with a previous line fit. A shared code path picks the method to use, and falls back to naive sliding window search if the previous line fit does not perform.
In the first method, the thresholded binary image is scanned on nine individual horizontal slices of the image. Slices start at the bottom and move up, selecting from the nearest to farthest point on the road. In each slice, a box starts at the horizontal location with the most highlighted pixels, and moves to the left or right at each step “up” the image based where most of the highlighted pixels in the box are detected, with some constraints on how far to the left or right the image can move and how big the windows are. Any pixels caught in each sliding window are used for a 2nd degree polynomial curve fit. This method is performed twice for each image, to attempt to capture both left and right lanes.
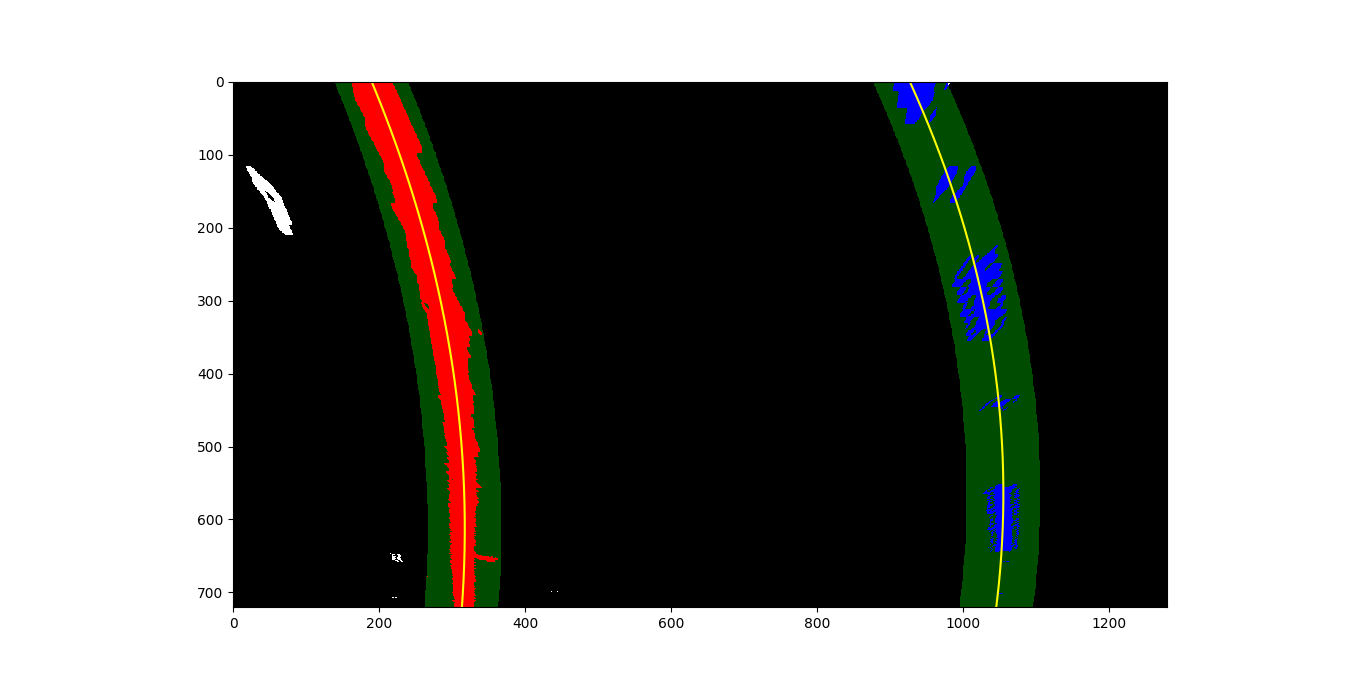
Here is an example of a thresholded binary with sliding windows and polynomial fit lines drawn over:
In the second method, two previous polynomial fit lines are used (likely taken from a previous frame of video) to generate a “channel” around the line with a given margin. Only highlighted pixels in the “channel” around the line are used for the next fit line. This method can ignore more noise than first method; this comes in particularly useful in areas of shadow or many yellow or white areas in the image that are not lane lines. This method can also fail if no pixels are detected in the “channel” around the previous line.
Here is an example of a thresholded binary with previous fit channels and polynomial fit lines drawn over:
Radius of curvature / vehicle position calculation
In this detection pipeline, radius of curvature computation is intertwined with curve and lane line detection smoothing.
In the first method, the radius of curvature is determined by computing the radius of curvature equation (straightforward algebra).
In the second method (which provides a small degree of curvature and lane smoothing from video frame to frame), the raw lane lines detected in the previous step are combined with the lane lines found in the previous ten frames of video. Lane lines whose curvatures are more than 1.5 standard deviations from the median are ignored, and the remaining curvatures are averaged. The lane lines with the curvature closest to the average are selected for both drawing onto the final image, as well as for the chosen curvature.
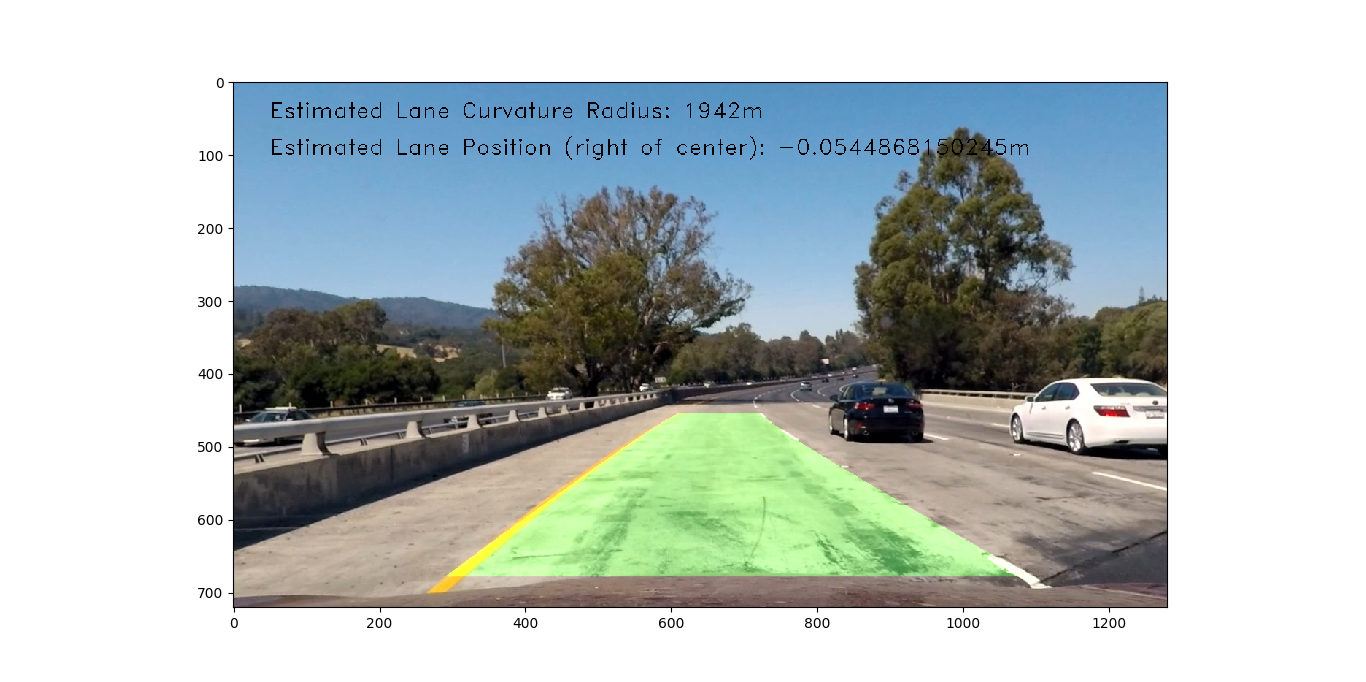
Lane detection overlay
After the lane line is chosen by the smoothing algorithm above, the lane line pixels are drawn back onto the image, resulting in this:
Final video output
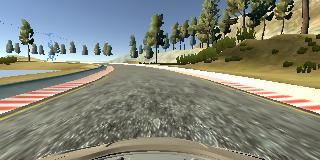
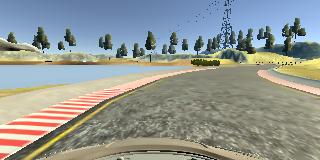
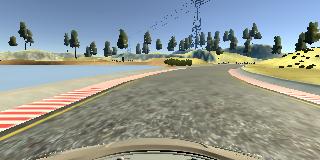
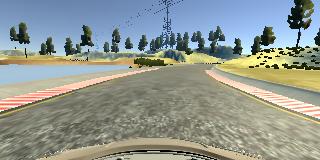
The lane detection algorithm was run on three videos:
Standard Video
Lane finding is quite robust, having some slight wobbles when the vehicle bounces across road surface changes and when shadows appear in the roadway
More difficult video
Lane finding is useful throughout the entire video, though the lane detection algorithm selects a shadow edge rather than the yellow lane line for a portion of the video
Most difficult video
Lane finding is primitive, staying with the lane for only a small portion of the time.
Problems / Issues
One of the biggest issues in the pipeline is non-lane line pixel detection in the thresholded binary image creator. Because of the simple nature of having channel thresholding in color spaces be the determiner of what pixels are likely part of lane lines, groups of errant pixels (“noise”) were occassionally added to the thresholded binary image which were not part of the lane lines.
Another big issue is that the lane line detection algorithms are not sufficiently robust to ignore this noise at all times. The naive sliding window algorithm, in particular, is sensitive to blocks of noise in the vicinity of actual lane lines, which shows up in the project videos in locations where large shadows intersect with lane lines. The polynomial fit-restricted lane line detection algorithm can ignore most of this noise, but if the lane line detection sways from the true line, recovery to the true line may take many frames.
Fixing these problems required tuning of the thresholded binary pixel detection and a substantial investment in lane line detection smoothing and outlier detection. However, because generally bad input data often leads to bad output (“garbage in, garbage out”), more time should be spent on improving noise reduction in the thresholded binary image before further tuning downstream.
Likely failure scenarios
It is already clear in the videos presented that the pipeline has occasional failures when lane lines cannot be clearly detected due to shadows cast. Other likely problem triggers include:
- Lanes not being painted clearly / faded / missing
- Vehicle decides to drive offroad and ignore lanes
- Vehicle drives in an area without yellow or while lanes
Future improvements
Future modifications to increase the robustness of the lane detection might include:
- Improving upon naive line detection algorithm to help eliminate effect of noise
- Look for other lane colors
- Use multiple steps in lane line pixel detection to use detectors with highest specificity first, then fall back to those with lower specificity if lane lines cannot be determine from initial thresholded binary
- Improving upon smoothing algorithm
- Use concept of “keyframing” from video compression technology to periodically revert back to naive line detection, even if polynomial fit line detection has detected a line, in case it is tracking a bad line segment